Have you ever wondered why it is important to sterilize glass bottles with rubber seals before using them to store your favorite jams, pickles, or preserves? Well, the answer is simple: it can help prevent contamination by bacteria, fungi, or yeasts. Proper sterilization is a crucial step in food preservation to ensure that your products last longer and remain safe to consume. In this article, we will guide you through the process of how to sterilize glass bottles with rubber seals and provide tips and important reminders that you should keep in mind. So, let’s get started!
I. Introduction
Importance of sterilizing glass bottles with rubber seals
Sterilizing glass bottles with rubber seals is an essential step in food preservation to prevent contamination by microorganisms that can cause food to spoil quickly. It is important to remember that no matter how clean your jars may look, they can easily be contaminated during the manufacturing process, warehousing, and transport. Sterilization is a simple process that should not be omitted in the canning process. Boiling or using other sterilization methods ensures that the jars and their seals are free from bacteria, fungi, or yeasts that can affect the quality and safety of your preserved food. It is important to note that boiling metal lids and their rubber sealing rings will damage the seal, which can result in contamination of the jar’s contents. Proper cleaning and sterilization of glass jars is crucial for your product’s success and longevity, so make sure to take the necessary steps to ensure its safety.
Benefits of proper sterilization
Sterilizing glass bottles with rubber seals is essential to ensure that they are free from harmful microorganisms that can cause spoilage or even illness. Proper sterilization ensures that the contents of the jars or bottles remain safe and free from contamination, making them suitable for storing homemade or commercial food and beverages. Benefits of sterilization also extend to the taste and texture of the contents. Proper sterilization can help retain the natural flavor and freshness of the food or beverage for a longer period, making it more enjoyable and nutritious. Sterilized bottles also have a longer shelf life and can be stored for months without the risk of bacterial growth. It is crucial to follow the correct sterilization methods and procedures to ensure optimal results and avoid any potential risks. With proper sterilization, you can enjoy the peace of mind that comes with knowing that your food and beverages are safe for consumption, making sterilized glass bottles with rubber seals the ideal choice for storing your homemade and commercial products.
II. Things to Consider Before Sterilizing Glass Bottles
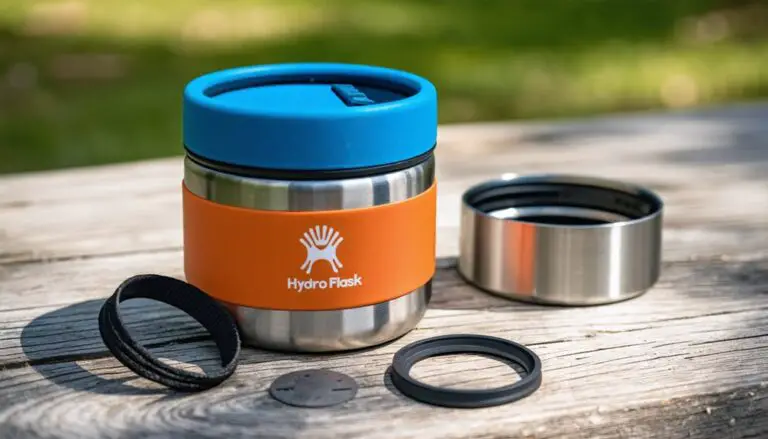
Avoid boiling metal lids and rubber seals
One important tip to keep in mind when sterilizing glass bottles with rubber seals is to avoid boiling the metal lids and rubber seals. While some may think that boiling would effectively clean and sterilize them, it can actually damage the rubber seal and cause it to break or not fit properly onto the jar. This can lead to contamination of the food inside. Instead, submerge the lids and rings into simmering water for a few minutes to thoroughly clean them. Additionally, be sure to check the interior of the metal lid for any rings before sanitizing your jars. It’s important to keep the sterilizing area clean and use oven mitts or tongs to handle jars during the sterilization process to avoid burning oneself. Proper sterilization is vital for preserving the quality and safety of the food stored in the glass jars.
Clean jars before sterilizing
It is very important to clean your glass jars thoroughly before you sterilize them. This will ensure that there are no dirt particles or residue left inside that could contaminate your preserves. You have two options to clean your jars: rice soaking and scrubbing with a bottle brush. The rice soaking method involves taking 1/4 cup of uncooked white rice and adding it to each jar along with 3 drops of dish soap and hot water. Close the jars and shake them for 20-30 seconds before draining the rice and rinsing the jars thoroughly. The scrubbing method involves using a bottle brush with soft bristles and hot water to scrub the inside of the jars. Make sure to brush all areas to prevent any microorganisms from growing. Rinse the jars multiple times and let them air dry on a strainer. Cleaning your jars properly before sterilizing them will ensure that your preserves have a longer shelf life and are free from harmful bacteria.
III. Cleaning Methods for Glass Bottles
Rice soaking method
The Rice soaking method is a valuable technique for cleaning and sterilizing glass bottles with rubber seals. This method involves adding raw white rice and dishwashing detergent to the bottom of the bottle, filling it three-fourths with hot water, covering the top, and shaking it for 20-30 seconds. The rice works as an abrasive agent, scrubbing away any grime or bacteria that may be present inside the bottle. After draining the rice and rinsing the bottle two to three times, it is left to air dry. This method is a great alternative for those who want a natural, chemical-free way of sterilizing their glass bottles, especially those used for food storage. Plus, it’s an eco-friendly method that reuses uncooked rice that might otherwise go to waste. So, if you’re looking for a simple, natural way to clean and sterilize your glass bottles with rubber seals, the Rice soaking method is definitely worth a try!
Scrubbing with a bottle brush
Scrubbing glass bottles with a bottle brush is a common method to remove dirt and grime from the interior of the bottles. It’s important to scrub every area of the bottle to ensure that all bacteria and residue are removed. When scrubbing the bottle, make sure to pivot the handle of the bottle brush to reach all spots inside the bottle. It’s best to use a brush with soft plastic bristles to prevent scratching the glass and leaving areas for bacteria to grow. Rinse the bottle with hot water to remove any debris or particles and repeat the rinsing process if necessary. Scrubbing with a bottle brush is effective, but it’s important to note that this method alone is not enough to sterilize glass bottles with rubber seals. Proper sterilization is crucial to ensure that all bacteria and germs are eliminated from the bottle to prevent contamination.
IV. Methods for Sterilizing Glass Bottles with Rubber Seals
A. Microwave Method
The microwave method is a quick and easy way to sterilize regular glass bottles. To use this method, clean and rinse your jars and then place them in the microwave on full power for 30-45 seconds, depending on the size of the jars. Make sure that the jars are not dry when you put them in the microwave. Once they are done, fill them with your preserves or jams while they are still hot. This sterilization method is not suitable for jars with metal lids or Kilner-style ones. The upside of this method is that it is quick, and you don’t need any additional equipment to unclench your jars. However, you need to be careful not to overcook your jars, as this can lead to shards of glass. Overall, the microwave method is an excellent sterilization option for those looking for a quick and easy way to sterilize regular glass bottles before filling them with their favorite preserves or jams.
Suitable for regular glass bottles
One method of sterilizing regular glass bottles is through the use of a microwave. This method is suitable for those who don’t have access to a dishwasher or an oven. To do this, first clean the bottles and make sure they’re not dry before placing them in the microwave. Microwave the bottles for 30-45 seconds depending on their size. This method is quick and easy, but it’s important to note that it’s not suitable for jars with metal lids or Kilner-style ones. For those types of jars, the dishwasher or oven method is recommended. It’s always important to properly sterilize glass bottles with rubber seals to prevent contamination and ensure the longevity of the stored contents. By following proper sterilization techniques, you’ll be able to enjoy your home-canned preserves, jams, and pickles without worry.
Clean the bottles and rinse them
Before sterilizing your glass bottles with rubber seals, it’s important to clean them properly. Cleaning your bottles ensures that there are no contaminants inside the bottle that could potentially harm the contents. There are two popular methods for cleaning glass bottles: the rice soaking method and scrubbing with a bottle brush. For the rice soaking method, take ¼ cup of raw and uncooked white rice and put it inside each jar, along with 3 drops of dish soap and ¾ of hot (not boiling) water. Close the jars and shake them for around 20-30 seconds before rinsing them thoroughly. Scrubbing with a bottle brush involves using a brush with soft bristles to scrub the bottle’s interior while wet with hot water. Make sure to brush all areas, pivoting the brush’s handle as needed. Rinse the jars with hot water and swish the water around to wash all areas of the jar’s interior before air-drying upside-down. Once the bottles are clean, they’re ready for sterilization.
Microwave the bottles for 30-45 seconds
Microwaving your glass bottles with rubber seals is a quick and easy way to sterilize them for use. Start by cleaning and rinsing the bottles as normal, but make sure to leave them slightly wet. Then, microwave them for 30 to 45 seconds depending on the size of the bottle. The microwaving process will eliminate any bacteria or fungi present in the bottles, making them safe for use in food storage. This method is suitable for regular glass bottles, but should not be used for bottles with metal lids or Kilner-style ones. Always make sure that the bottles are not completely dry before microwaving, as this could cause them to break. Once microwaved, place the bottles upside down on a piece of absorbent paper to dry off. This sterilization method is ideal for those who don’t have access to a steam dishwasher or who are short on time. Overall, microwaving is a convenient and effective way to sterilize your glass bottles with rubber seals.
B. Dishwasher Method
If you’re like most people, you probably rely on your dishwasher to clean your dishes every day. But did you know that you can also use your dishwasher to sterilize glass bottles with rubber seals? This method is especially useful if you are canning a lot of jars at once, as it allows you to sterilize a large number of bottles quickly and easily. To sterilize your glass bottles with a dishwasher, make sure your dishwasher has a high temperature setting (at least 160°F / 71°C) and a sanitize cycle. Wash your empty jars with soap and hot water, and remove all lids and rubber rings, which can also be sterilized separately in the dishwasher. Rinse everything properly, making sure to remove all soapy suds. Place your jars upside down in the top rack of the dishwasher, along with the lids and rubber rings, and start the dishwasher on its hottest cycle. Add a steam dry cycle. Leave your dishwasher door closed until you’re ready to fill your jars. Then remove a jar at a time as needed and fill with your warm preservative. It’s that easy!
Suitable for jars with screw tops, rubber rings, and clip tops
If you have jars with screw tops, rubber rings, and clip tops, the best method for sterilizing them is through the dishwasher method. It’s easy and convenient, but it does use up plenty of water. All you have to do is run a rinse cycle with your cleaned jars in the dishwasher. Take note of the ending time and make sure it matches with when your preserves or jams are ready for canning. Once the rinse cycle is done, you can fill your jars with the warm preserve and seal them properly. The only downside with this method is it’s hard to time the ending cycle with the exact time you need to fill your jars. However, it’s still an effective way to sterilize jars, especially if you have a lot of them and don’t have time to sterilize them manually.
Run a rinse cycle with cleaned jars in the dishwasher
One of the easiest and most convenient methods for sterilizing glass jars with rubber seals is to use a dishwasher. With this method, you can eliminate the need for boiling water or complicated sterilization techniques. Simply clean your jars thoroughly and place them upside down on the top rack of your dishwasher. Run a rinse cycle with the jars in the dishwasher to start the sterilization process. It’s important to make sure that your dishwasher has a high-temperature setting of at least 160°F and a sanitize cycle to ensure that your jars are sterilized properly. While this method may be the easiest, it does use up a considerable amount of water. Plus, it can be difficult to time the cycle’s ending with when your product is ready for canning. Overall, the dishwasher method is a reliable way to make sure your jars are thoroughly clean before filling them with your preserves or jams.
Suitable for jars with rubber rings and clip tops
The dishwasher method is suitable for jars with rubber rings and clip tops. It is a convenient way to sterilize your jars and requires minimal effort. Simply run a rinse cycle with your cleaned jars in the dishwasher. However, it can be tricky to time the cycle’s ending with the time when your product is ready for canning. Another issue with this method is that it uses up a lot of water, which may not be ideal for those conscious about their environmental impact. If you have a steam dishwasher or a machine with a setting for high temperature, this method is perfect for sterilizing Kilner-style glass jars and jars with screw tops, rubber rings, and clip tops. If you’re concerned about water usage or don’t have a dishwasher, you can always opt for other sterilization methods such as the oven or instant pot method. Regardless of the method you choose, it’s important to properly sterilize your jars to ensure the safety and longevity of your homemade preserves.
Preheat oven to 130°C or 275°F
One of the trusted and effective ways to sterilize glass bottles with rubber seals is by preheating the oven to 130°C or 275°F. This method ensures that your jars are scrupulously clean and free from bacteria, yeast, and fungi that can spoil your jams or pickles. However, it’s important to note that any temperature higher than 130°C can cause the glass to break, making it essential to take extra precaution when handling the glassware in and out of the oven. To start, wash your jars and lids with hot soapy water and rinse well. Lay them on a double layer of newspaper on a baking sheet and place them in the oven, making sure they don’t touch each other. Then, sterilize the jars for a minimum of 20 minutes and use thick oven mitts when taking them out of the oven. This method works well for jars with rubber rings, clip tops, and screw tops, ensuring that your homemade jams and preserves are a success.