Sterilizing baby bottles is an essential step in ensuring your little one’s health and safety. MAM bottles are known for their high-quality materials and design, making them a popular choice among parents. In this blog post, we will discuss how to sterilize MAM bottles using an electric sterilizer.
Importance of Sterilizing MAM Bottles
Babies have fragile immune systems, and their little bodies are more susceptible to harmful bacteria and germs. Sterilizing MAM bottles is crucial because it helps eliminate these potential hazards, ensuring that your baby drinks from a clean and safe bottle every time.
When you sterilize MAM bottles, you eliminate bacteria like Listeria and E. coli, which can cause severe illnesses such as gastrointestinal infections. By prioritizing sterilization, you can provide peace of mind and promote your baby’s overall well-being.
Benefits of Using an Electric Sterilizer
Using an electric sterilizer offers several advantages when it comes to sterilizing MAM bottles:
- Convenience: Electric sterilizers are easy to use and save time. Simply place the MAM bottles and their components, such as nipples and caps, into the sterilizer, add water, and let the sterilizer do its work. Many electric sterilizers also have automatic shut-off features, ensuring that the bottles remain sterile until needed.
- Efficiency: Electric sterilizers use heat and steam to effectively kill bacteria and other harmful germs. The high temperatures generated in the sterilizer can reach up to 212 degrees Fahrenheit, effectively sterilizing the bottles within minutes.
- Gentle on Materials: MAM bottles are made of high-quality materials that can withstand the heat generated by the electric sterilizer. Electric sterilizers are designed to provide gentle yet efficient sterilization, ensuring that your MAM bottles remain in excellent condition for extended use.
- Storage: Many electric sterilizers come with built-in storage areas, allowing you to keep the sterilized bottles protected until needed. This feature is particularly useful when traveling or when you need bottles readily available during late-night feedings.
Overall, using an electric sterilizer to sterilize MAM bottles provides convenience, efficiency, and peace of mind knowing that your baby is drinking from a clean and sanitized bottle.
If you’re a parent using MAM bottles, investing in an electric sterilizer is a worthwhile choice. Not only does it simplify the sterilization process, but it also ensures that your baby’s bottles are germ-free, promoting their health and well-being.
Preparing the Electric Sterilizer
Cleaning and Set up of Electric Sterilizer
When it comes to sterilizing your baby’s bottles, an electric sterilizer can be a convenient and effective option. Here is a step-by-step guide on how to sterilize MAM bottles in an electric sterilizer:
Step 1: Before using the electric sterilizer, ensure that it is clean and free from any residue. Follow the manufacturer’s instructions for cleaning and assembly. It’s essential to keep the sterilizer clean to maintain its effectiveness.
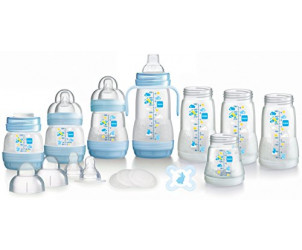
Step 2: Disassemble the MAM bottles by removing the bottle, bottle base, nipple, and ring. Separate all the parts and ensure they are clean, free from any milk residue or debris.
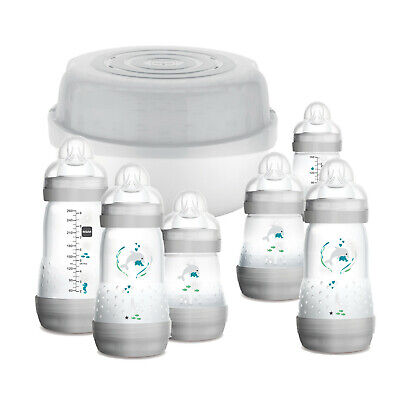
Step 3: Place the MAM bottles and its components inside the sterilizer, making sure they are arranged in a way that allows steam to circulate evenly. Avoid overpacking the sterilizer as it may affect the sterilization process.
Adding Water to the Sterilizer
Step 1: Check the manufacturer’s instructions to determine the recommended amount of water for the sterilizer. Different electric sterilizers may have varying water capacity requirements.
Step 2: Pour the appropriate amount of water into the sterilizer’s water chamber. Avoid overfilling or underfilling the chamber, as it may affect the sterilization process.
Step 3: Place the lid securely on the sterilizer, ensuring that it is tightly closed. This will help to create the necessary steam environment for effective sterilization.
Once you have completed these steps, you can turn on the electric sterilizer and select the appropriate sterilization cycle as per the manufacturer’s instructions. The sterilization cycle typically lasts for around 5-15 minutes, depending on the model and settings. It is crucial to follow the sterilizer’s instructions carefully to ensure proper and safe sterilization of your MAM bottles.
Remember, a sterilizer is an essential tool for keeping your baby’s bottles clean and free from harmful bacteria. By following the correct steps and using an electric sterilizer, you can ensure a hygienic feeding experience for your little one.
Disassembling the Mam Bottles
When it comes to sterilizing baby bottles, an electric sterilizer can be a convenient and efficient method. If you have Mam bottles, here’s a step-by-step guide on how to sterilize them using an electric sterilizer.
Removing Bottle Components
Before sterilizing the Mam bottles, it’s vital to disassemble them properly. This allows the sterilizer to reach all areas and ensure thorough sterilization. Follow these steps:
- Start by removing the bottle from the cap.
- Unscrew the bottle’s bottom and remove the sealing disc.
- Take out the bottle’s vented base.
- If your Mam bottle has an anti-colic system, separate the components accordingly.
- Remove the bottle’s nipple and collar.
Once you’ve successfully disassembled the Mam bottles, you’re ready to proceed to the next step.
Separating Bottles from Nipples and Caps
To sterilize the Mam bottles efficiently, it’s necessary to separate the bottles from the nipples and caps. This ensures that all parts receive adequate sterilization. Follow these steps:
- Group all the bottle components together, such as the caps, nipples, and collars.
- Place the bottles, nipples, and caps in separate compartments of the electric sterilizer, following the manufacturer’s instructions.
- Ensure that the components are arranged in a way that allows steam to reach all surfaces.
Now that you’ve successfully disassembled the Mam bottles and separated the parts for sterilization, you can proceed to sterilize them using your electric sterilizer. Always refer to the manufacturer’s instructions for the specific sterilization time and procedure for your particular electric sterilizer model.
Remember, proper and regular sterilization of baby bottles is crucial for maintaining hygiene and minimizing the risk of infections. By following these steps and sterilizing your Mam bottles correctly, you can provide your little one with clean and safe feeding equipment.
Placing the Mam Bottles in the Electric Sterilizer
When it comes to sterilizing Mam bottles in an electric sterilizer, it’s important to ensure that they are arranged properly for effective sterilization. Here are some tips to help you sterilize your Mam bottles safely and efficiently.
Arranging the Bottles Properly
1. Disassemble the Bottles: Before placing the Mam bottles in the electric sterilizer, make sure to disassemble them completely. This includes removing the bottle parts such as the teats, collars, and caps. Disassembling the bottles will help ensure that all the parts are thoroughly sterilized.
2. Place the Bottles Upright: The next step is to place the bottles upright in the sterilizer. This allows the steam to circulate evenly and reach all parts of the bottle, ensuring thorough sterilization. Make sure to place the bottles in a way that they are stable and won’t tip over during the sterilization process.
3. Separate the Bottle Parts: It’s also important to separate the bottle parts while arranging them in the sterilizer. This helps prevent the parts from getting tangled or stuck together during the sterilization process. Ensure that each part is placed separately, with enough space between them for the steam to penetrate and sterilize them effectively.
Ensuring Sufficient Space Between Bottles
4. Avoid Overcrowding: It’s crucial to avoid overcrowding the sterilizer by placing too many bottles or parts at once. Overcrowding can hinder the steam from reaching all the surfaces of the bottles, leading to ineffective sterilization. Allow sufficient space between each bottle to maximize the sterilization process.
5. Follow the Manufacturer’s Guidelines: Lastly, it’s essential to follow the manufacturer’s guidelines for your specific electric sterilizer. Different sterilizers may have different capacities and instructions. Refer to the user manual or consult the manufacturer’s website for guidance on the recommended arrangement of Mam bottles in the sterilizer.
Taking these steps will help ensure that your Mam bottles are properly sterilized in an electric sterilizer. Remember to clean the bottles thoroughly before placing them in the sterilizer and always follow the instructions provided by the manufacturer for the best results.
Note: This article provides general guidelines for sterilizing Mam bottles in an electric sterilizer. It’s always recommended to refer to the specific instructions provided by the Mam bottle manufacturer and the electric sterilizer manufacturer for the most accurate and up-to-date guidance.
Starting the Sterilization Cycle
When it comes to the safety and cleanliness of your baby’s feeding equipment, proper sterilization is essential. One of the most popular methods for sterilizing baby bottles is using an electric sterilizer. In this blog section, we will guide you on how to sterilize MAM bottles in an electric sterilizer.
Selecting the Appropriate Sterilization Setting
Before starting the sterilization process, it’s crucial to select the appropriate setting on your electric sterilizer. Different sterilizers may have various settings, so it’s essential to refer to the manufacturer’s instructions. For MAM bottles, follow these general guidelines:
- Fill the sterilizer base with the recommended quantity of water. This is usually indicated by a line or marker on the base.
- Place the MAM bottles and their respective parts (nipples, caps, and rings) in the sterilizer. Make sure to disassemble the bottles completely before placing them in the sterilizer.
- Check the manufacturer’s instructions to determine the appropriate setting for sterilizing baby bottles. Most electric sterilizers have a specific setting for baby bottles, which usually involves a longer sterilization cycle.
Activating the Sterilizer
Once you have selected the appropriate setting, it’s time to activate the sterilizer. Here are the general steps to follow:
- Close the sterilizer securely, ensuring that no steam can escape during the sterilization process.
- Plug in the sterilizer and switch it on. Some sterilizers have an automatic start function, while others require you to press a button to begin the cycle.
- Wait for the sterilization cycle to complete. This can take anywhere from a few minutes to around 10 minutes, depending on the sterilizer model and selected setting.
- Once the cycle is complete, allow the sterilizer to cool down for a few minutes before opening it. Be cautious when removing the sterilized MAM bottles, as they may still be hot.
It’s important to note that every electric sterilizer may have slightly different instructions, so it’s crucial to follow the guidelines provided by the manufacturer. For specific instructions on how to sterilize your MAM bottles in an electric sterilizer, refer to the user manual or contact MAM directly.
By following these steps, you can ensure that your MAM bottles are properly sterilized and safe for your baby’s use. Regular sterilization of baby bottles helps eliminate harmful bacteria and provides peace of mind for parents.
Waiting and Cooling Period
Allowing the Sterilization Cycle to Complete
Rapid Cooling and Drying Process
Blog Section:
Waiting and Cooling Period
When it comes to sterilizing baby bottles, electric sterilizers can be a convenient and efficient option. They are designed to eliminate harmful bacteria, viruses, and other germs that can pose a risk to your baby’s health. However, it’s important to follow the proper steps to ensure the bottles are effectively sterilized. Here’s a guide on how to sterilize MAM bottles in an electric sterilizer.
Allowing the Sterilization Cycle to Complete
When using an electric sterilizer, it’s crucial to allow the sterilization cycle to complete fully. Most electric sterilizers have a specific duration for the sterilization cycle, usually around 8 to 15 minutes. During this time, the sterilizer heats the bottles to a high temperature to kill any bacteria and germs.
It is important to:
- Follow the manufacturer’s instructions for your specific sterilizer model.
- Ensure that the bottles and their components are properly arranged in the sterilizer.
Rapid Cooling and Drying Process
After the sterilization cycle is complete, the bottles will be hot and need to cool down before they can be safely handled. Many electric sterilizers have a rapid cooling and drying process to speed up this cooling phase. This feature helps to ensure that the bottles are ready for use quickly while also preventing any damage to the bottles or their components.
To complete the rapid cooling and drying process:
- Leave the bottles in the sterilizer for the recommended cooling time.
- Once the cooling time has elapsed, carefully remove the bottles and their components from the sterilizer.
Remember to allow the bottles to cool completely before assembling them or adding any liquid. If the bottles are still warm, it’s best to wait a little longer to prevent burns or damage to the bottles.
With proper use, electric sterilizers can effectively sterilize MAM bottles and ensure your baby’s feeding equipment is clean and safe. Always refer to the manufacturer’s instructions and guidelines for your specific sterilizer model to ensure proper operation and maintenance.
Removing and Storing the Sterilized MAM Bottles
Taking Out the Bottles from the Sterilizer
When it comes to sterilizing MAM bottles in an electric sterilizer, it’s essential to follow the proper procedure to ensure that the bottles are thoroughly cleaned and safe for your baby to use. To remove the sterilized bottles from the sterilizer, follow these steps:
- Switch off the electric sterilizer and unplug it from the power source for safety.
- Carefully open the sterilizer and use tongs or clean, heat-resistant gloves to take out the sterilized MAM bottles.
- Take extra caution while handling the hot bottles to avoid burns or injuries.
Proper Storage of Sterilized Bottles
After removing the sterilized MAM bottles from the electric sterilizer, it’s crucial to store them correctly to maintain their cleanliness and hygiene. Here are some tips for proper storage:
- Allow the bottles to cool down completely before storing them. Placing hot bottles in a closed container can create a breeding ground for bacteria.
- Choose a clean and dry container for storing the sterilized bottles. It’s recommended to use a container with a tight-fitting lid to prevent dust or dirt from contaminating the bottles.
- Avoid touching the inside of the bottles or the nipples with your bare hands to maintain their cleanliness. If needed, use clean tongs or gloves for handling.
- Consider storing the sterilized bottles in a designated area that is free from moisture, dust, and other potential contaminants.
- Label the stored bottles with the date of sterilization to keep track of their freshness.
By following these steps, you can ensure that your MAM bottles remain sterilized and ready for use when your baby needs them. Remember to regularly clean and sterilize your bottles to maintain proper hygiene and safety for your little one.
If you’re unsure about the proper sterilization process for MAM bottles, it’s always a good idea to consult the manufacturer’s instructions or speak with a healthcare professional for guidance.
Conclusion
In conclusion, sterilizing MAM bottles using an electric sterilizer is a convenient and efficient way to ensure your baby’s bottles are free from harmful bacteria and germs. The electric sterilizers offer several advantages over other methods, including speed, ease of use, and the ability to sterilize multiple bottles at once. By following the manufacturer’s instructions and safety guidelines, you can safely sterilize your MAM bottles and provide your baby with the clean and germ-free feeding experience they deserve. Remember to regularly check and maintain your electric sterilizer to ensure its effectiveness and longevity. Taking the time to properly sterilize your MAM bottles can help promote your baby’s health and provide you with peace of mind. So, invest in a reliable electric sterilizer today and make bottle sterilization a hassle-free part of your daily routine!
Advantages of Using an Electric Sterilizer for MAM Bottles
Using an electric sterilizer to sterilize your MAM bottles offers several advantages over other methods:
- Speed: Electric sterilizers can sterilize MAM bottles within a short time, usually in 6 to 15 minutes. This quick sterilization process is especially convenient for busy parents who need to prepare bottles on the go.
- Efficiency: Electric sterilizers use steam to eliminate harmful bacteria and germs, ensuring that your baby’s bottles are thoroughly sterilized. This method is highly effective and can eliminate up to 99.9% of germs.
- Convenience: Electric sterilizers are designed to be user-friendly, with simple controls and easy-to-follow instructions. Many electric sterilizers also have automatic shut-off functions, preventing the risk of overheating or accidental burns.
- Capacity: Most electric sterilizers can accommodate multiple bottles, nipples, and other feeding accessories at once. This feature is especially beneficial for parents with twins or multiple children, as it allows for efficient sterilization in one go.
Safety Tips and Considerations when Sterilizing Bottles
While using an electric sterilizer for MAM bottles is generally safe and straightforward, it’s important to keep the following tips and considerations in mind:
- Follow manufacturer instructions: Read and follow the instructions provided with your electric sterilizer carefully. This ensures proper usage and optimizes the sterilization process.
- Check bottle compatibility: Before purchasing an electric sterilizer, ensure that it is compatible with your MAM bottles or any other bottles you plan to use. Not all bottles are suitable for all sterilizers.
- Regular cleaning: Clean your electric sterilizer regularly, according to the manufacturer’s recommendations. This helps remove mineral deposits and keeps the sterilizer functioning at its best.
- Proper handling: Be cautious when removing hot bottles from the sterilizer. Use oven mitts or tongs to avoid burns.
Remember, sterilizing your MAM bottles using an electric sterilizer is an essential part of maintaining your baby’s health and safety. With the convenience and effectiveness offered by electric sterilizers, you can confidently provide your baby with clean and germ-free bottles for a worry-free feeding experience.