
As a parent, keeping your baby’s bottles clean is essential. While dish soap may seem like the obvious choice for cleaning baby bottles, it’s not the only option. If you’re looking for a soap-free method for cleaning your baby’s bottles, then you’ve come to the right place. This guide will take you through the steps of how to clean baby bottles without soap, so you can have peace of mind knowing your little one’s feeding equipment is thoroughly clean and safe to use. So, grab your cleaning supplies and let’s get started!
Importance of thoroughly cleaning baby bottles
As a parent, it’s essential to prioritize your baby’s health, and that means taking every step to ensure that the feeding equipment is clean and sterilized. When you bottle-feed your baby, you’ll need to clean and sterilize every part of the bottle, including the teat, and screw cap after every feed. But why clean so thoroughly? Well, babies have an undeveloped immune system compared to adults, which means they are susceptible to infections caused by bacteria and germs. Milk is a perfect medium for bacteria growth, so when cleaning the feeding equipment, you’re cutting off the possibility of bacteria and germs build-up in the equipment. Therefore, it’s vital to clean and sterilize every feeding equipment properly until the baby is 12 months old to prevent your baby from getting sick. A clean feeding bottle means a healthier baby!
Alternative cleaning methods without soap
When it comes to cleaning baby bottles, soap isn’t always necessary. While washing with hot, soapy water after every use is recommended, alternative cleaning methods exist for sterilization. One popular method involves boiling water. Simply submerge the clean bottles in a pot of boiling water and let them boil for 5 minutes. Another option is using a microwave sterilizer that uses steam to sanitize the bottles. However, before using any alternative cleaning method, it’s important to understand the pros and cons of each method, as well as some precautions to take. For example, vinegar is an effective natural cleaning solution, but it must be used with caution and correctly diluted. Baking soda and lemon with salt are also safe and effective solutions but should be used in the right quantities. With these alternative cleaning methods, parents can ensure their children’s bottles are clean and sterilized without the use of harsh chemicals.
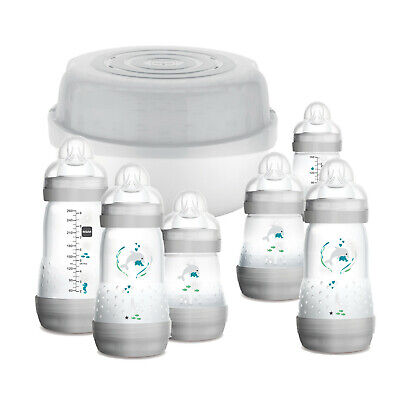
1) Hot water sterilization
Boiling water method
One of the most traditional and inexpensive ways to clean and sterilize baby bottles is by using the boiling water method. To do this, you’ll need a large pot with a lid and enough water to cover the bottles. After thoroughly washing the bottles, place them in the pot and ensure they are fully submerged in the water. Bring the water to a boil and let the bottles boil for at least five minutes. Be careful when removing the pot from the heat and use tongs to remove the bottles from the boiling water. Place the bottles on a clean and dry dishcloth and let them air dry. This method effectively kills any germs and bacteria that may be present in the bottles, making it a great option for parents on a budget. However, be sure to check the manufacturer’s guidelines to ensure that the boiling water method won’t harm your bottles.
Microwave sterilization
Microwave sterilization is an easy and convenient way to clean baby bottles without using soap. To do this, wash your bottle and fill it halfway with water, then place it upright in the microwave. Make sure the bottle is open and the nipple is facing up so steam can escape. Microwave the bottle for 90 seconds to kill any germs or bacteria. Be careful when removing the bottle from the microwave as it will be hot. Allow it to cool sufficiently before using. On the downside, not all bottles are microwave-safe, so you need to check before trying this method. Additionally, plastic bottles can warp or melt, so glass bottles are a better option for this sterilization method. Despite these drawbacks, microwave sterilization is a quick and easy way to ensure your baby’s bottles are clean and safe for use.
Pros and cons of each method
When it comes to cleaning baby bottles, there are several methods to choose from, each with their own pros and cons. Boiling water is a simple and cost-effective way to sterilize bottles, but it can be time-consuming and may cause wear and tear on bottles over time. Microwave sterilization is quick and easy, but it requires a special sterilizing device and may not be as effective as other methods. Using vinegar for cleaning and sterilizing is a natural option that is effective, but the strong smell may be off-putting and precautions need to be taken to avoid accidentally ingesting it. Baking soda is another natural method that effectively cleans bottles, but it can be problematic for those with sensitive skin or respiratory issues. Lemon and salt is a simple and natural way to clean bottles, but it may not be as effective at sterilizing as other methods. Overall, it’s important to weigh the pros and cons of each method when deciding how to clean and sterilize baby bottles.
2. Vinegar sterilization
How vinegar helps clean and sterilize bottles
Vinegar is a natural disinfectant and a great alternative to soap for cleaning and sterilizing baby bottles. It helps to kill bacteria and germs that may be left on the bottles even after washing with soap and water. In addition to its cleaning properties, vinegar is also a cost-effective alternative to other cleaning solutions. You can simply create a vinegar solution by soaking baby bottles in a mixture of equal parts white vinegar and hot water for a few minutes or up to an hour, depending on the level of cleaning needed. Afterwards, rinse with cold water and let the bottles air dry. However, it is important to remember to always rinse out the bottles thoroughly to prevent any vinegar taste. Using vinegar to clean baby bottles, along with other natural cleaning methods, is not only eco-friendly, but also ensures that your little one’s bottles are thoroughly cleaned and sterilized.
Step-by-step guide for vinegar sterilization
Vinegar is a great alternative to soap when it comes to sterilizing baby bottles. It is a natural disinfectant that can effectively kill bacteria and germs. To sterilize baby bottles with vinegar, you will need to first clean the bottles with hot soapy water. Next, rinse them thoroughly with water. Fill a clean container with a solution of equal parts water and white vinegar. Make sure that the solution is enough to cover the bottles completely. Place the bottles in the solution and let them soak for at least five minutes. After five minutes, remove the bottles and rinse them thoroughly with water. Make sure that all traces of vinegar are removed. Allow the bottles to air dry before using them. It is important to note that vinegar has a strong smell, so you might want to rinse the bottles a few times to make sure that the smell is completely gone. Also, do not use vinegar on bottles that have etched measurement markings, as it can cause them to become illegible.
Precautions when using vinegar
When using vinegar to clean baby bottles, there are a few precautions that you should keep in mind to ensure that your baby’s feeding equipment is safe and free from any harmful bacteria or germs. Firstly, while vinegar is a great bonus cleaner, it is important to still use soapy water to ensure that you are getting rid of any germs left behind after your baby has been fed. Additionally, you should make sure to thoroughly wash out the vinegar from the bottles to prevent curdling of formula or breastmilk, which can cause a change in taste and spoil future bottles. It is also essential to rinse out the vinegar from your breastmilk pump parts to avoid any unpleasant vinegar taste. Lastly, while vinegar is an excellent natural cleaning agent, you should avoid using it on certain materials like marble or stone, as it can cause damage. By following these precautions, you can use vinegar safely and effectively to clean your baby bottles and keep your little one healthy and happy.
3. Baking soda cleaning technique
How baking soda cleans baby bottles
Baking soda is a great natural and economical solution for cleaning baby bottles. It is safe to use and does not leave any harmful residue on the bottles. Baking soda works by neutralizing acid and breaking down proteins, which are often found in milk residues. When you mix baking soda with hot water, it forms a powerful cleaning solution that removes unwanted smells and stains. Simply add two tablespoons of baking soda to each bottle and fill it with hot water. Then, give the bottle a good shake and let it soak for a few hours. After that, rinse the bottle thoroughly with warm water and let it dry. Baking soda not only cleans the inside of the bottle, but it also helps to clean the nipples, valves, and other bottle parts. It is an effective and natural way to ensure that your baby’s feeding equipment is clean and free from harmful bacteria.
Step-by-step guide for baking soda cleaning
When it comes to cleaning baby bottles, baking soda is a popular alternative to soap. Not only is it safe and gentle for your baby, but it’s also highly effective at removing any odors or residues. Here’s a step-by-step guide for cleaning baby bottles with baking soda: First, mix 1-2 tablespoons of baking soda with a small amount of water to create a paste. Next, use a bottle brush to scrub the interior and exterior of the bottle, paying special attention to the nipples, rings, and other hard-to-reach areas. Rinse thoroughly with warm water to ensure all traces of the baking soda are removed. Finally, air-dry the bottle and all its components before using again. Baking soda not only helps to clean and deodorize your baby’s bottles, but it’s also a natural disinfectant, making it a great alternative to soap. Plus, it’s an inexpensive and readily available option for busy parents.
Benefits and drawbacks of using baking soda
Using baking soda as a cleaning agent for baby bottles has several benefits, such as being a natural and affordable way to clean. It can also remove tough stains and eliminate odor. Additionally, it is gentle on baby’s skin and does not contain harmful chemicals that could cause irritation. However, there are also some drawbacks that must be considered. Baking soda does not sanitize the bottles, which means that it does not kill bacteria. It is also not an effective method for removing protein buildup from breast milk or formula. Furthermore, excessive use of baking soda can cause the bottles to become cloudy over time. Despite these drawbacks, baking soda remains a popular alternative cleaning method without soap for cleaning baby bottles. When used correctly and in moderation, it can be a useful addition to a baby’s bottle-cleaning routine.
4. Lemon and salt cleaning approach
Why lemon and salt are effective for cleaning
Lemon and salt are an effective natural cleaning solution for baby bottles, and it’s no wonder why. Lemons have natural antibacterial properties, while salt acts as a gentle abrasive that can help remove stubborn debris. Together, they create a powerful solution that can tackle even the toughest stains and odors. To clean baby bottles using lemon and salt, simply add a scoop or two of crushed ice, ¼ cup rock salt, 2 tablespoons of lemon juice, and 2 tablespoons of dish soap to the bottle. Screw on the lid tightly, then shake vigorously for about 30 seconds. Dump out the mixture, rinse with hot water, and allow the bottle to air-dry. But, it’s important to note that while lemon and salt cleaning is effective, it’s important to take certain precautions when using these ingredients. For example, lemon should not be used on metal, as it can cause corrosion. Additionally, it’s important to thoroughly rinse the bottle after using lemon and salt to ensure that all residue is removed.
Step-by-step guide for lemon and salt cleaning
Lemon and salt are natural ingredients commonly used in household cleaning, and they can also be used to clean baby bottles. Here is a simple step-by-step guide for cleaning baby bottles using lemon and salt. Start by cutting a lemon in half and squeezing the juice into a bowl. Add a tablespoon of salt to the bowl and mix well. Take the disassembled baby bottle and dip it into the mixture. Use a bottle brush to scrub the inside and outside of the bottle thoroughly. Pay attention to the nipples and any other parts that require cleaning as well. Rinse the bottle well with cold water to remove any residue. Repeat the process if necessary. Lemon and salt are effective in removing stains, grime, and odors and leave the bottles smelling fresh. It’s important to know that lemons are acidic, so you should use the mixture sparingly and rinse the bottle well with cold water to avoid leaving any residue that may harm the baby.
Precautions when using lemon and salt
While using lemon and salt to clean baby bottles is an excellent natural alternative, it is crucial to take precautions to ensure the safety of your baby. Firstly, ensure that you use fresh lemons for each cleaning session and do not use bottled lemon juice as it may contain preservatives that could be harmful. Also, make sure to rinse the bottles thoroughly after cleaning to avoid leaving any residue that could potentially harm your baby. Secondly, do not use excessive salt as it could corrode the plastic and make the bottle unusable. It is recommended to use a small amount of salt mixed with lemon juice and water for cleaning. Lastly, never use lemon and salt to clean bottles that had any dairy products as it may cause sour milk odours that are difficult to get rid of. By taking these precautions, you can make sure that you are using lemon and salt effectively and safely to clean your baby’s bottles.
Highlighting the importance of proper cleaning for baby bottles.
Proper cleaning of baby bottles should be a top priority for all parents and caregivers. Babies are susceptible to illnesses and infections, and dirty or improperly cleaned bottles can harbor harmful bacteria and germs. Thoroughly cleaning and sterilizing bottles after each use is crucial to ensure the safety and health of your baby. It’s important to take apart all parts of the bottle and rinse them well before cleaning them with an appropriate cleaning method. Alternative cleaning methods such as using vinegar, baking soda, lemon, and salt can also effectively clean and sterilize bottles without the use of harsh chemicals. However, it’s important to follow safety precautions when using these alternative methods. Always read the manufacturer’s instructions for proper cleaning and sterilization techniques and make sure to clean your bottles regularly. By taking the time to clean and sterilize baby bottles properly, you can help prevent your baby from getting sick and promote a healthy and safe environment for your little one.