
A leaking water bottle cap can be an infuriating problem, but fear not! With the right steps, you can easily fix it and prevent any further leaks. In this blog post, we will explore the factual data and provide you with a concise guide on how to fix a leaking water bottle cap. By following these steps, you’ll be able to enjoy your water bottle without any messy leaks. Let’s get started!
I. Why is a leaking water bottle cap a problem?
Have you ever experienced the frustration of a leaking water bottle cap? It’s not only an annoyance but can also cause a host of problems in your daily life. From ruining your bag or backpack to creating a mess in your car or office, a leaking water bottle cap can quickly become a nuisance.
Why is a leaking water bottle cap a problem?
- Wasted water: A leaking water bottle cap can result in water wastage, especially if you don’t notice it immediately. This not only affects your hydration but also contributes to environmental concerns.
- Messy and inconvenient: A leaking cap can result in water seeping out onto your belongings, whether it’s your bag, backpack, or desk. This leads to unnecessary clean-up and potential damage to your personal items.
- Hygiene concerns: A leaking water bottle cap can make the bottle susceptible to bacteria growth, potentially compromising your health. It’s important to address the issue to ensure a hygienic drinking experience.
- Reduced portability: With a leaking cap, you might hesitate to take your water bottle with you on the go. This can lead to dehydration and a lack of access to clean drinking water throughout the day.
- Waste of money: Constantly replacing water bottles due to leaking caps can add up in terms of both cost and environmental impact. Fixing the issue can help save money and reduce waste.
It’s crucial to address a leaking water bottle cap promptly to avoid these complications. In the following sections, we will explore common causes of leaking caps and provide practical solutions to fix them.
How can it affect your daily life?
A leaking water bottle cap may seem like a minor inconvenience, but it can actually have a significant impact on your daily life. Here are a few ways it can affect you:
- Mess and Clean-Up: A leaking bottle cap can create a mess, causing water to spill onto surfaces, such as your desk, bag, or car seat. This can lead to time-consuming clean-up tasks and potential damage to your belongings.
- Hydration Issues: If your water bottle is leaking, you may not be able to rely on it for a steady supply of hydration throughout the day. This can be particularly problematic if you’re in a situation where access to water is limited, such as during outdoor activities or while traveling.
- Wasted Resources: A leaking bottle cap can result in water being wasted, which is not only environmentally unfriendly but can also be costly if you rely on bottled water for daily hydration.
- Disruption of Routine: Having to deal with a leaking water bottle cap can be frustrating and disruptive to your daily routine. It can lead to interruptions in important activities, such as work or exercise, as you may need to stop and find a solution or a replacement bottle.
To avoid these issues, it’s essential to address a leaking water bottle cap promptly and find a solution that works for you.
II. Assessing the Issue
Identifying the cause of the leak
Identifying the cause of the leak is the first step in fixing a leaking water bottle cap. There can be several reasons why a bottle cap may leak, and understanding the cause is crucial in finding an effective solution. Here are some common reasons for leaking bottle caps:
- Loose cap: Sometimes, the cap may not be tightened properly, causing a leak. Ensure that the cap is securely tightened to create a tight seal.
- Damaged seal or O-ring: Bottle caps usually have a seal or O-ring that prevents leakage. If this component is damaged, worn out, or misplaced, it can result in leaks. Inspect the seal or O-ring for any signs of damage or misalignment.
- Cracked cap or bottle: Cracks or damages in the cap or bottle can also lead to leaks. Carefully examine the cap and bottle for any visible cracks or damage.
- Bottle material compatibility: Some water bottles are not compatible with certain types of caps, leading to leakage. Make sure that the cap is designed to fit your specific bottle.
- Overfilling the bottle: Overfilling the bottle can cause the liquid to push against the cap, resulting in leakage. Leave some space at the top to prevent this issue.
By identifying the cause of the leak, you can determine the most appropriate solution to fix the problem and prevent future leaks.
Common reasons for leaking bottle caps
Common reasons for leaking bottle caps can vary depending on the type and condition of the cap. Here are some common causes of leaks:
- Damaged or worn-out O-ring or seal: The O-ring or seal inside the bottle cap can degrade over time, causing it to lose its ability to create a tight seal. This can result in leaks around the threads of the bottle.
- Loose cap: Sometimes, a bottle cap may not be tightened properly, leading to small gaps that allow liquid to escape. It is essential to ensure the cap is securely tightened to avoid leaks.
- Cracks or damage to the cap: If the bottle cap is cracked or damaged, it may not be able to create a tight seal. This can result in leaks when the bottle is tilted or squeezed.
- Incorrect cap size or compatibility: Using a mismatched or improperly sized cap can also lead to leaks. It is important to use caps that are specifically designed for your bottle.
Proper maintenance and regular inspection of the bottle cap can help identify and address these common causes of leaks. By addressing the root cause, you can effectively fix a leaking water bottle cap and avoid any inconvenience caused by leaks.
III. Quick Fixes
Tightening the bottle cap
One of the first things you should do when you notice a leaking water bottle cap is to tighten it. Often, a loose cap is the culprit behind the leakage. Here are some steps you can follow to properly tighten the bottle cap:
- Start by firmly holding the bottle with one hand to provide stability.
- With your other hand, grip the cap and turn it clockwise (to the right) to tighten it.
- Apply steady force while twisting to ensure a secure seal.
- Be careful not to overtighten the cap, as this can cause damage or make it difficult to open in the future.
If tightening the cap doesn’t solve the issue, it’s worth exploring other potential causes of the leak. However, in many cases, this simple step can effectively stop the leakage and save you from dealing with a wet and bothersome situation.
Wiping and drying the cap and bottle threads
Wiping and drying the cap and bottle threads is a crucial step in fixing a leaking water bottle cap. This is because moisture or debris on the threads can prevent a proper seal, leading to leaks. To start, use a clean cloth or paper towel to wipe the threads of both the cap and the bottle. Make sure to remove any dirt, residue, or water that may have accumulated.
Next, ensure that both the cap and the bottle are completely dry before reassembling them. This will help to create a tight seal and prevent any moisture from interfering with the cap’s ability to close securely.
It’s also important to check for any damage or wear on the threads. If you notice any cracks, chips, or signs of deterioration, it may be necessary to replace the cap or seek professional assistance to fix the issue.
Remember, regularly cleaning and drying the cap and bottle threads can help prevent leaks and prolong the lifespan of your water bottle.
Using sealants or adhesives for temporary solutions
When dealing with a leaking water bottle cap, using sealants or adhesives can provide a temporary solution to stop the leak. These products can help create a tight seal and prevent water from seeping out. Here are some steps to follow when using sealants or adhesives:
- Clean the bottle cap and threads thoroughly to remove any dirt or debris.
- Apply a small amount of sealant or adhesive to the inside of the cap where it makes contact with the bottle threads.
- Screw the cap back onto the bottle firmly to ensure a good seal.
- Let the sealant or adhesive dry completely according to the manufacturer’s instructions before using the bottle.
It is important to note that using sealants or adhesives is only a temporary solution. Over time, the sealant may break down or lose its effectiveness, resulting in leaks again. It is recommended to regularly check the cap and replace it if necessary for a more long-term fix.
IV. Replacing the O-ring or Seal
Understanding the importance of the O-ring or seal
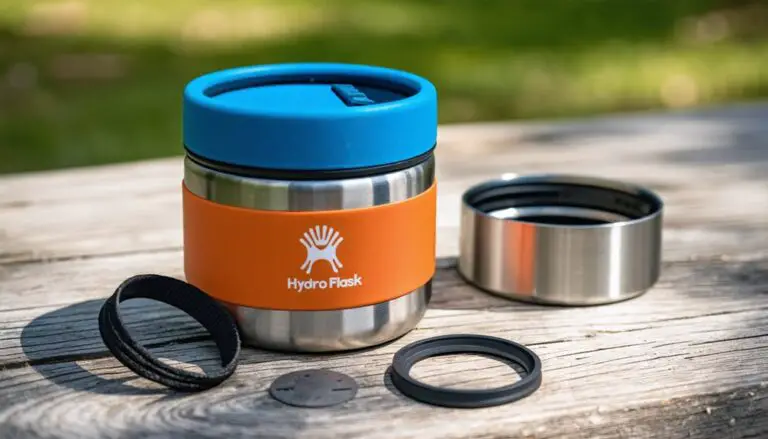
Understanding the importance of the O-ring or seal is crucial when it comes to fixing a leaking water bottle cap. The O-ring or seal is a small ring-shaped component made of rubber or silicone that sits inside the cap, creating a tight seal between the cap and the bottle.
This seal is essential because it prevents any liquid from leaking out of the bottle when the cap is securely tightened. Over time, the O-ring or seal can become worn out, deformed, or damaged, resulting in a faulty seal and leakage.
To fix a leaking water bottle cap, it may be necessary to replace the O-ring or seal. This typically involves removing the old seal, cleaning the area, and installing a new one. It’s important to make sure the replacement seal is the correct size and material to ensure a proper fit and effective seal.
Regularly inspecting and maintaining the O-ring or seal can help prevent leaks and extend the lifespan of your water bottle cap.
Steps to replace a worn-out or damaged O-ring or seal
If you’ve identified that the cause of the leak in your water bottle cap is a worn-out or damaged O-ring or seal, here are the steps to replace it:
- Purchase a replacement O-ring or seal: Determine the specific size and type of O-ring or seal that your water bottle requires. You can find replacement parts at hardware stores, plumbing supply stores, or online retailers.
- Drain the water: Empty any remaining liquid from your water bottle to avoid spills or accidents during the replacement process.
- Remove the old O-ring or seal: Carefully remove the existing O-ring or seal from the cap. You can use a small screwdriver or your fingernails to gently pry it loose.
- Clean the cap: Thoroughly clean the cap and the area where the O-ring or seal sits. Use warm, soapy water and a soft brush to remove any dirt, debris, or residue.
- Install the new O-ring or seal: Take the replacement O-ring or seal and carefully position it in the groove where the old one was. Ensure that it fits snugly and forms a tight seal.
- Test for leaks: Once the new O-ring or seal is in place, screw the cap back onto your water bottle tightly. Fill the bottle with water and check for any signs of leakage. If there are no leaks, your replacement was successful.
By following these steps, you can easily replace a worn-out or damaged O-ring or seal in your water bottle cap and prevent any further leakage. Remember to choose a high-quality replacement part for optimal performance.
V. Cleaning and Maintenance
Proper cleaning techniques for bottle caps
Proper cleaning techniques for bottle caps are essential to prevent leaks and maintain the functionality of your water bottle. Here are some tips to help you clean your bottle caps effectively:
- Remove the cap from the bottle: Before cleaning the bottle cap, ensure that it is detached from the bottle.
- Use warm, soapy water: Fill a basin or sink with warm water and add a small amount of dish soap. Stir the water to create a soapy solution.
- Scrub the cap: Place the cap in the soapy water and use a soft sponge or brush to scrub away any dirt or residue. Pay close attention to the inner parts of the cap, including the seal or O-ring.
- Rinse thoroughly: Once the cap is clean, rinse it thoroughly under running water to remove any soap residue.
- Dry completely: After rinsing, pat the cap dry with a clean cloth or allow it to air dry completely before reattaching it to the bottle.
Regular cleaning of your bottle caps will not only prevent leaks but also ensure the hygienic use of your water bottle. By following these cleaning techniques, you can keep your bottle caps in excellent condition and enjoy leak-free hydration on the go.
Regular maintenance to prevent leaks
Regular maintenance is essential to prevent leaks in water bottle caps and ensure their proper functioning. Here are some key steps you can take to maintain your water bottle and prevent leaks:
- Clean the bottle and cap regularly: Rinse the bottle and cap with warm soapy water after each use. This will remove any residue or build-up that can affect the seal.
- Check the O-ring or seal: Inspect the O-ring or seal for signs of wear or damage. If it appears cracked, worn, or missing, it may need to be replaced.
- Tighten the cap properly: Ensure that the cap is tightened securely but not overly tight. This will help create a proper seal without causing damage to the cap or bottle.
- Store the bottle properly: Avoid subjecting the bottle to extreme temperatures or placing it in a way that can cause pressure on the cap. This can help prevent deformation or damage to the cap.
- Avoid using harsh chemicals or abrasive cleaners: These can deteriorate the quality of the cap or compromise the seal, leading to leaks.
By following these maintenance tips, you can prolong the lifespan of your water bottle cap and minimize the risk of leaks. Remember, prevention is key to avoiding frustrating leaks and ensuring a reliable water bottle for everyday use.
VI. Upgrading to a Leak-Proof Bottle Cap
Types of leak-proof bottle caps available in the market
When it comes to fixing a leaking water bottle cap, it’s important to consider the different types of leak-proof bottle caps available in the market. While not all bottle caps are created equal, there are several options that can help prevent leaks and keep your water bottle secure. Here are some common types of leak-proof bottle caps you can find:
- Screw-Top Caps: These caps typically have threads that securely screw onto the bottle, creating a tight seal. They are commonly used for reusable water bottles and are known for their reliability.
- Flip-Top Caps: These caps feature a hinged lid that easily flips open with the press of a button or a push-down motion. They often come with a secure locking mechanism to prevent accidental spills.
- Push-Pull Caps: These caps have a push-pull spout mechanism that allows you to open and close the cap with ease. They are commonly found on sports and outdoor water bottles and provide quick access to your drink.
- Straw Caps: These caps usually have a built-in straw that extends from the cap, allowing you to drink without tilting the bottle. They are popular among athletes and individuals on the go.
- Spout Caps: These caps have a small spout or nozzle that you can open and close for controlled pouring or drinking. They are commonly used for water bottles with wider mouths.
- Insulated Caps: These caps are designed to keep your drinks cold or hot for an extended period. They often have an additional seal or gasket to provide extra insulation and prevent leaks.
When choosing a leak-proof bottle cap, it’s important to consider your specific needs, such as the type of bottle you have and the activities you’ll be using it for. Additionally, check for customer reviews and ratings to ensure the cap you choose is reliable and effective in preventing leaks.
Choosing the right cap for your specific needs
When it comes to fixing a leaking water bottle cap, one of the most important steps is choosing the right cap for your specific needs. Different caps have different features and capabilities that can help prevent leaks and ensure a more reliable seal.
Here are some factors to consider when choosing the right cap:
- Material: Look for caps made from durable and food-grade materials like BPA-free plastic or stainless steel. These materials are less likely to warp or degrade over time, ensuring a tighter seal.
- Closure Mechanism: Consider caps with a secure closure mechanism, such as screw-on caps or flip-top lids with a locking feature. These types of closures provide a more reliable seal and are less prone to accidental leaks.
- O-Ring or Seal: Check if the cap has an O-ring or seal, as this component plays a crucial role in preventing leaks. Opt for caps with high-quality, replaceable O-rings or seals for long-lasting leak-proof performance.
- Compatibility: Ensure that the cap is compatible with your water bottle or container. Look for caps that are specifically designed for the brand and model of your bottle to ensure a proper fit.
By considering these factors, you can choose a water bottle cap that meets your specific needs and provides a reliable solution for preventing leaks. Remember to also follow proper cleaning and maintenance techniques to keep your cap in optimal condition and prolong its lifespan.
VII. DIY Solutions
Using household items to fix a leaking bottle cap
If you’re dealing with a leaking water bottle cap and need a quick fix, don’t worry! There are several household items you can utilize to address the issue. One effective method is to use food-grade silicone sealant. Apply a thin layer of the sealant around the inside rim of the cap, ensuring it covers any cracks or gaps. Then, firmly screw the cap onto the bottle and let it dry for a few hours. Another alternative is to use plumbers tape or Teflon tape. Wrap the tape around the threads of the bottle cap before screwing it back on tightly. This tape creates a tight seal and helps prevent leaks. Additionally, if you have a small piece of rubber or cork lying around, you can cut it into a circular shape and place it between the cap and the bottle to provide an additional barrier against leaks. Remember to test your DIY fix by shaking the bottle to see if any leaks occur. However, it’s important to note that these are temporary solutions, and if the leaking persists or worsens, it may be time to consider purchasing a new water bottle cap or consulting a professional.
Creative and innovative ideas for DIY fixes
If you’re feeling creative and want to try some DIY fixes for a leaking water bottle cap, there are a few innovative ideas you can consider:
- Silicone sealant: Apply a thin layer of food-grade silicone sealant around the inner rim of the bottle cap. This will create a waterproof barrier and prevent leaks.
- Heat shrink tubing: Cut a small piece of heat shrink tubing and slide it onto the threads of the bottle cap. Use a hairdryer or heat gun to heat the tubing, causing it to shrink and create a tight seal.
- Rubber band or elastic band: Wrap a rubber band or elastic band tightly around the bottle cap, ensuring it covers the area where the cap screws onto the bottle. This added pressure can help seal any gaps and prevent leaks.
- Wax or candle: Light a candle and hold the bottle cap upside down over the flame for a few seconds. The heat will melt some wax, which can then be used to create a temporary seal when pressed onto the rim of the bottle.
Remember, these DIY fixes may provide temporary solutions and may not be as effective or long-lasting as professional repairs. If the leaking issue persists or worsens, it’s best to consult a professional or consider purchasing a new leak-proof bottle cap.
IX. Seeking Professional Help
When to consult a professional for stubborn leaks
When it comes to fixing a leaking water bottle cap, most issues can be resolved with simple DIY solutions. However, in some cases, stubborn leaks may persist despite your best efforts. In such situations, it may be necessary to consult a professional for assistance. Here are some signs that indicate it’s time to seek expert help:
- Multiple failed attempts: If you’ve tried various DIY fixes and the leak persists, it’s a clear indication that the issue may be more complex than you anticipated.
- Structural damage: If the bottle cap or the threading on the bottle is visibly damaged, it may require professional repair or replacement.
- Unusual leaks: If the leak is coming from unexpected areas of the bottle or the cap, it could indicate a more serious underlying problem that needs professional attention.
- Specialized equipment or expertise: If the leak is caused by a specific component that requires specialized tools or knowledge to repair, it’s best to leave it to the experts who have the necessary equipment and expertise.
Remember, consulting a professional for stubborn leaks can help ensure a proper and long-lasting fix. They can assess the issue accurately, provide the right solution, and save you from further frustration or potential damage to your water bottle.
Finding specialized services for fixing bottle cap issues
If you have tried all the DIY fixes and are still struggling with a leaking water bottle cap, it may be time to seek specialized services for fixing the issue. These services are typically offered by companies that specialize in repairing or replacing bottle caps and other similar products. They have the knowledge, experience, and tools necessary to address complex leaks and ensure a proper seal.
When looking for specialized services, it is essential to do your research and find a reputable company. Look for reviews and testimonials from past customers to get an idea of their track record. Additionally, consider factors like turnaround time, pricing, and customer service.
Some companies may offer on-site repairs, where they come to your location to fix the issue. Others may require you to send the bottle cap to their facility for repair. Make sure to inquire about the service options available and choose the one that is most convenient for you.
Specialized services can be particularly useful for repairing complex bottle caps with unique features or proprietary mechanisms. They have the expertise to identify and resolve specific issues, ensuring a watertight seal.
In summary, if you have exhausted all other options and are still unable to fix a leaking water bottle cap, it is worth considering specialized services. These professionals can provide specialized knowledge and expertise to resolve your issue and ensure your bottle cap is leak-free once again.
X. Key takeaways for fixing leaking water bottle caps
When it comes to fixing a leaking water bottle cap, there are a few key takeaways to keep in mind. Here’s a quick summary of what you need to know:
- Identify the cause of the leak: Before attempting any fixes, it’s important to understand why your bottle cap is leaking. Common reasons include loose caps, damaged seals, or worn-out O-rings.
- Tighten the bottle cap: If the leak is due to a loose cap, simply tightening it may solve the issue. Make sure to tighten it securely but not too tight.
- Wipe and dry the cap and bottle threads: Moisture or debris on the cap or bottle threads can cause leaks. Clean and dry them thoroughly before closing the bottle to ensure a proper seal.
- Use sealants or adhesives for temporary solutions: If you need a quick fix, you can apply sealants or adhesives around the cap to create a temporary seal. However, keep in mind that this may not be a long-term solution.
- Replace a worn-out or damaged O-ring or seal: If the O-ring or seal on your bottle cap is worn-out or damaged, replacing it with a new one can solve the problem. Make sure to choose the right size and material for a proper seal.
- Regular maintenance to prevent leaks: To avoid future leaks, regularly clean and maintain your water bottle caps. This includes cleaning the cap and bottle threads, inspecting the seals or O-rings for wear, and replacing them as needed.
Remember, if the leak persists or you’re unable to fix it yourself, it may be best to consult a professional or seek specialized services for fixing bottle cap issues.